Bulgarian
 Croatian
 Czech
Czech
 Danish
 Dutch
Dutch
 English
 Estonian
 Finnish
 French
 German
 Greek
Greek
 Hungarian
 Italian
 Latvian
 Lithuanian
 Maltese
 Polish
 Portuguese
 Romanian
 Russian
 Serbian
 Slovak
 Slovenian
 Spanish
 Swedish
 Turkish
 Ukrainian
 Arabic
 Chinese
 Hebrew
 Georgian
 Kazakh
 Icelandic
 Uzbek
Uzbek


| Details description |
|---|
|
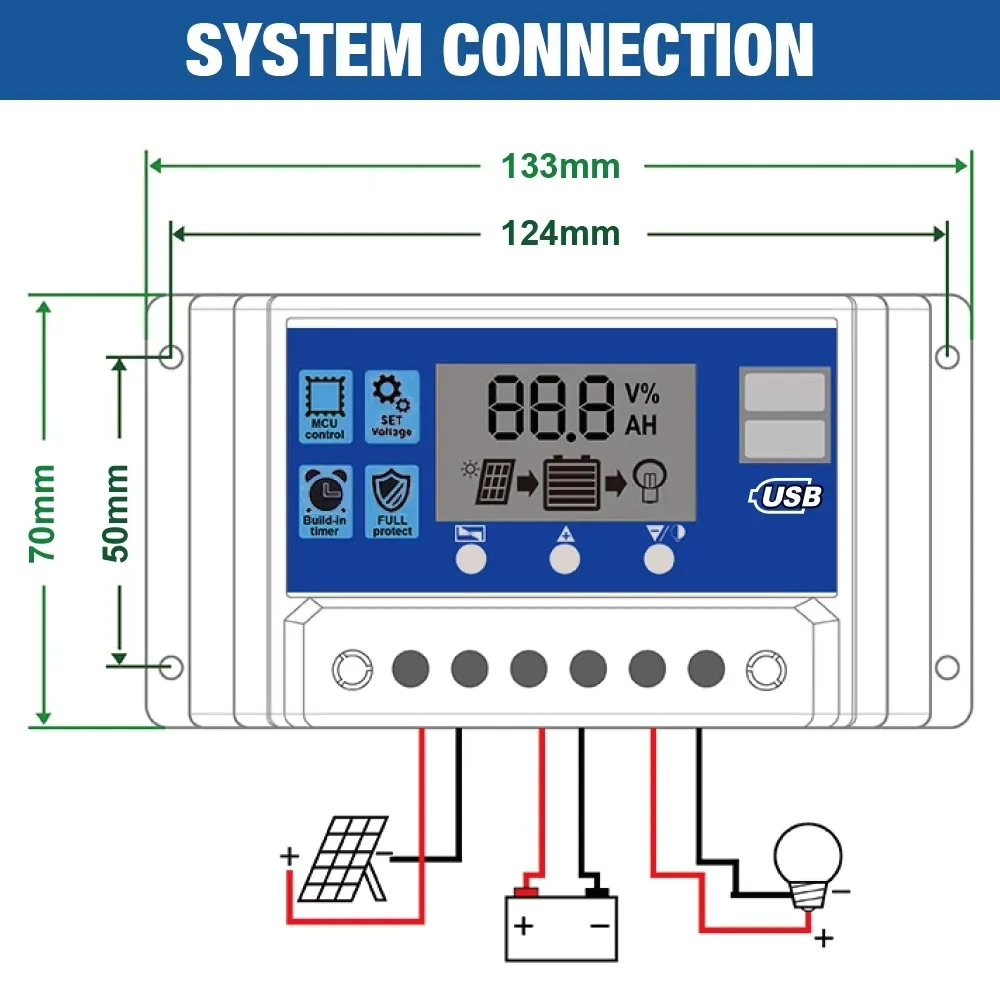
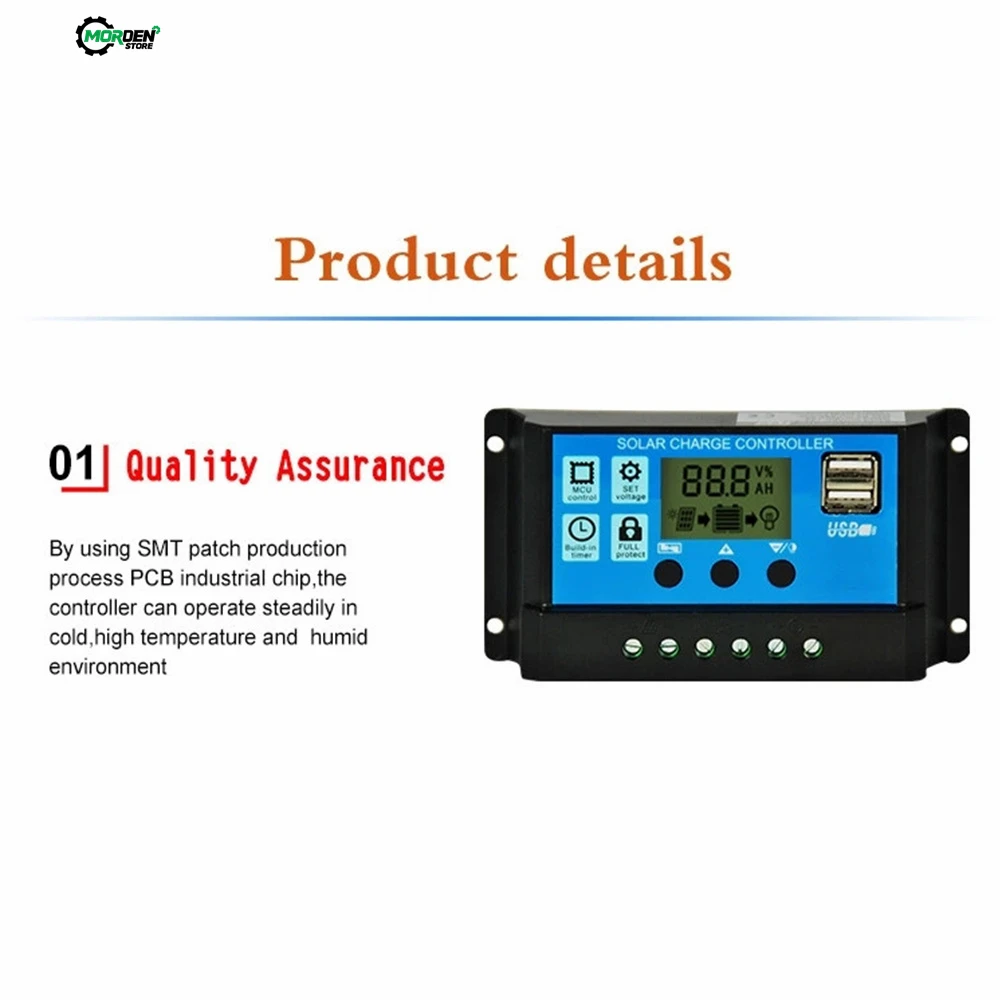
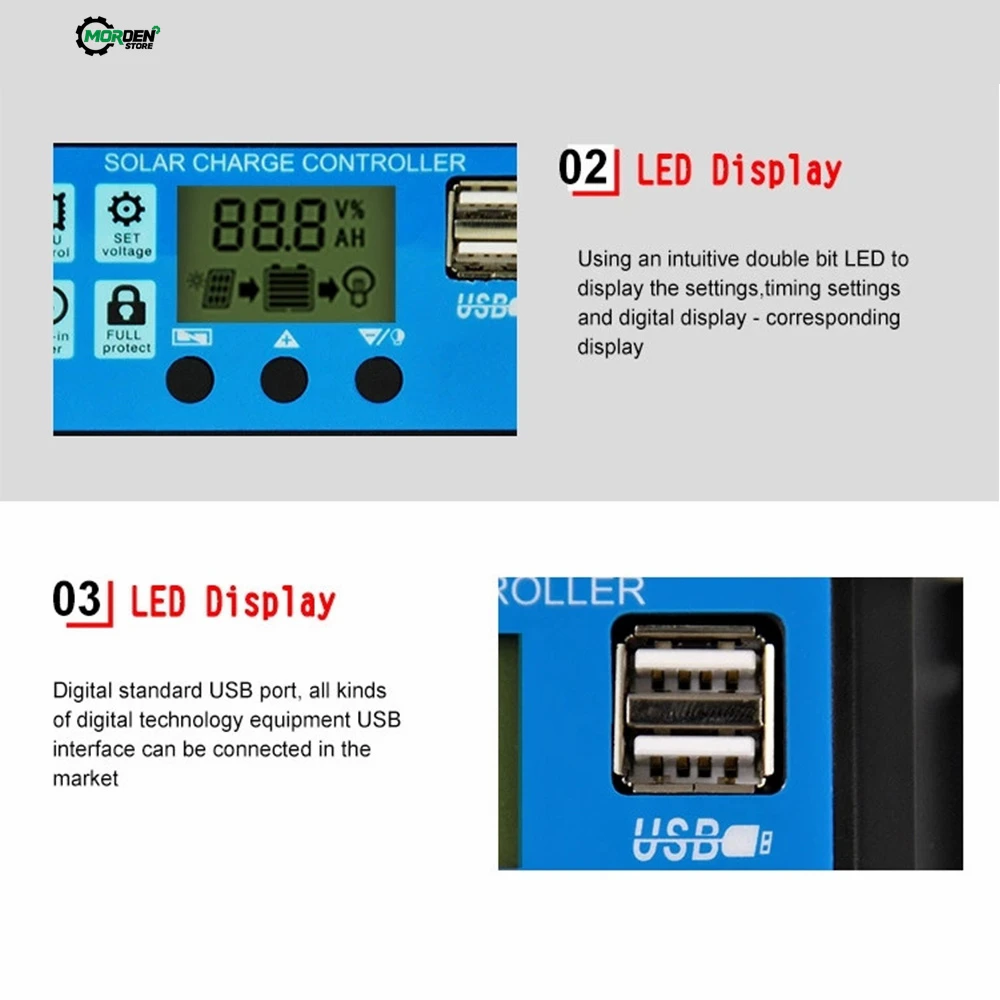
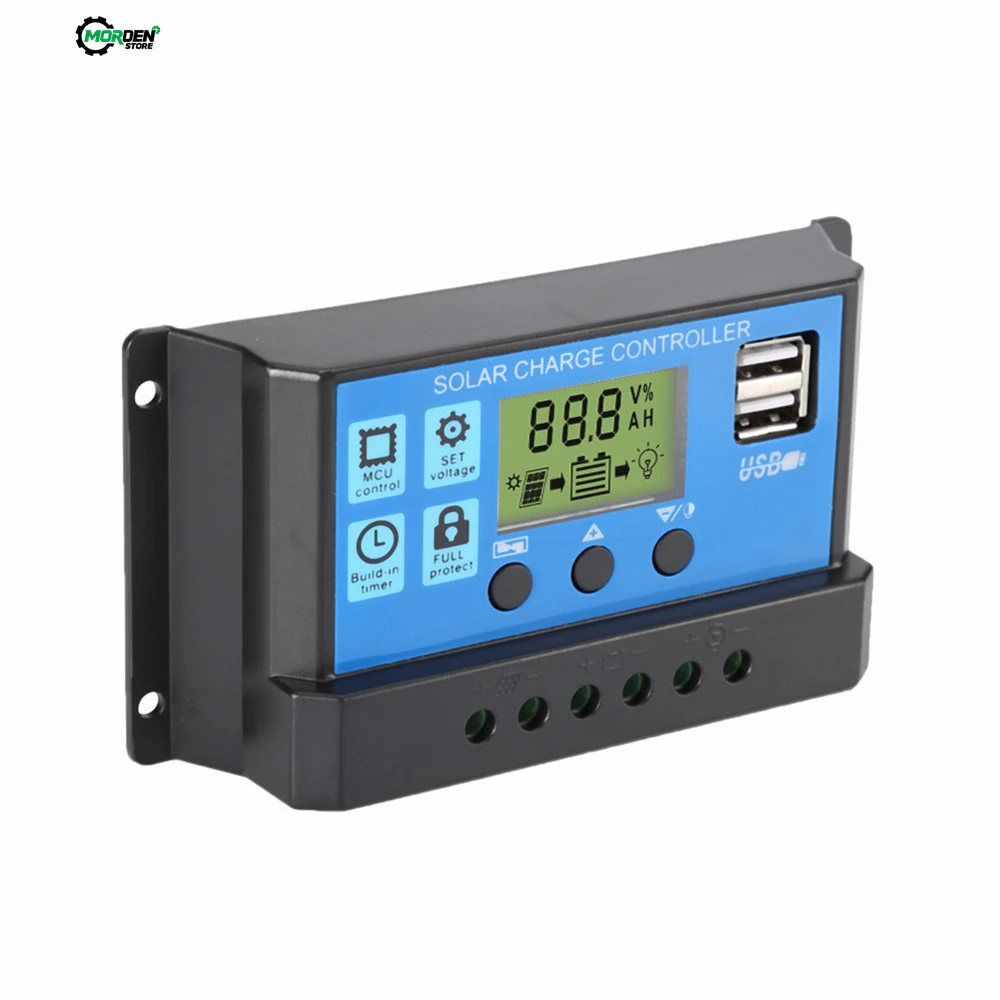
Feature: 1. High-performance industrial-grade main control chip, stable and reliable 2. LCD display, battery power grid display, intuitive and easy to operate 3. Intelligent light control timing, energy saving and environmental protection, more convenient and efficient operation 4. Built-in overcurrent/short circuit protection, open circuit protection, reverse connection protection, overcharge protection, over-discharge protection 5. MOS tube anti-backflow circuit chip, protect the battery from damage and enhance stability 6. Support multiple battery types: lithium battery/acid/lithium iron phosphate Product parameters: Name: 12V/24V Solar controller System voltage: 12V/24V adaptive Rated charging current: 10A/20A/30A Rated discharge current: 10A Maximum photovoltaic voltage: 12V battery <(18V-23V)/24V battery <(36V-46V) Float charge voltage: 14.4V (default value, adjustable) Discharge cut-off voltage: 10.7V (default value, adjustable) Discharge recovery voltage: 12.6V (default value, adjustable) USB output: 2 USB outputs, 5V/1A Standby current: <10mA Operating temperature: -35~+60℃ Note: Some product parameters only correspond to 12V system. If you use 24V system, please refer to the instruction manual Safety use suggestions: 1. This controller defaults to 12V/24V automatic adaptation. When installing for the first time, please be sure to connect the battery first and ensure that the battery has enough voltage so that the controller can recognize it as the correct battery type. 2. Install the controller as close to the battery as possible to avoid voltage drop caused by long wires, which will affect normal voltage judgment. 3. This controller is only suitable for B1 acid batteries, B2 lithium batteries, and B3 lithium iron phosphate batteries. 4. This controller can only use photovoltaic panels as a charging power source. Do not use DC or other power sources as charging power sources. 5. This controller will generate heat when running. Please pay attention to install the controller on a flat and well-ventilated surface. System connection: 1. Connect the positive and negative poles of the battery to the controller according to the wiring diagram, and the controller will automatically detect the battery voltage. 2. Connect the positive and negative poles of the load to the controller according to the wiring diagram. Be careful not to connect them in reverse. 3. Connect the solar panel to the controller according to the wiring diagram. Note: Please connect strictly in the above order, otherwise the controller may be damaged. The disassembly order is opposite to the wiring order. Package List: Solar Controller x1
|


No review yet!
Delivery Feb 16 - 19